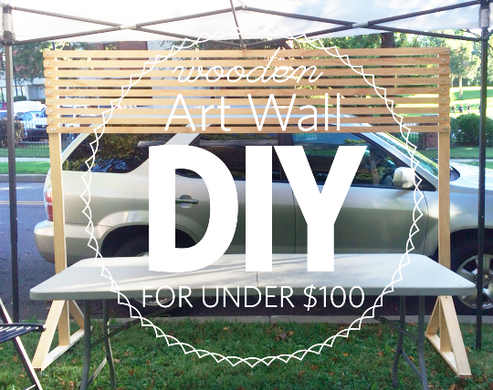
 MATERIALS Nine (9) 1" x 2" - 8 ft. Pine Boards (variable, as needed) Four (4) 1" x 3" - 6 ft. Pine Boards Screws 22 Bolts (at least 2-4 in each slat, as needed) 22 Nuts (at least 2-4 in each slat, as needed) Drill Lockable pliers 4 2" Non-marking caster wheels (2 with brake, optional based on preference) Saw (as needed, most home improvement and supply stores will provide material-cutting services at no additional charge) UNPLAZA ART FAIR 2015 We recently participated in the UNPlaza Art Fair by PeaceWorks KC in Kansas City, Missouri to offer our photography, prints + more to the art lovers of the region. We were among so many talented artists who showed at the annual event, hosted just blocks from the Nelson-Atkins Museum of Art, Kemper Museum of Contemporary Art, and the Country Club Plaza, modeled after Kansas City's sister city, Seville, Spain. For this show, we used a different technique of displaying our work - a wooden art wall constructed of raw materials. This wall can be easily recreated, modified, assembled and taken down, and stowed for future use. So easy, in fact, one person is able to do it alone, if needed.
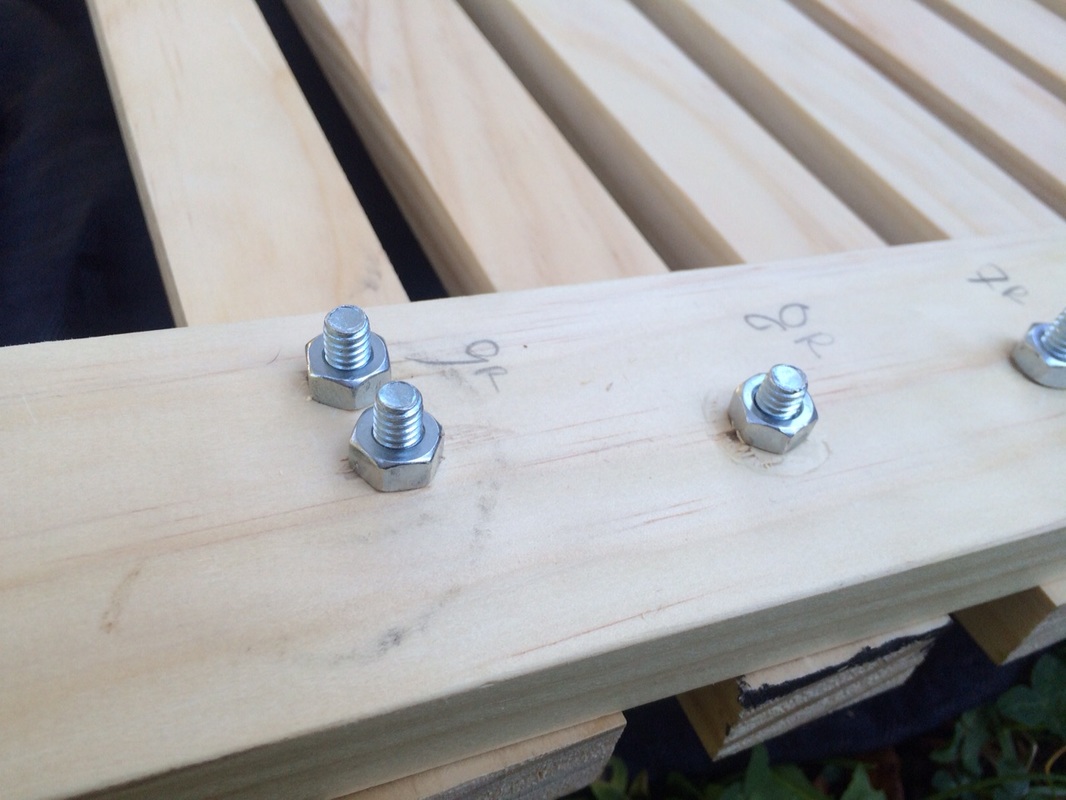
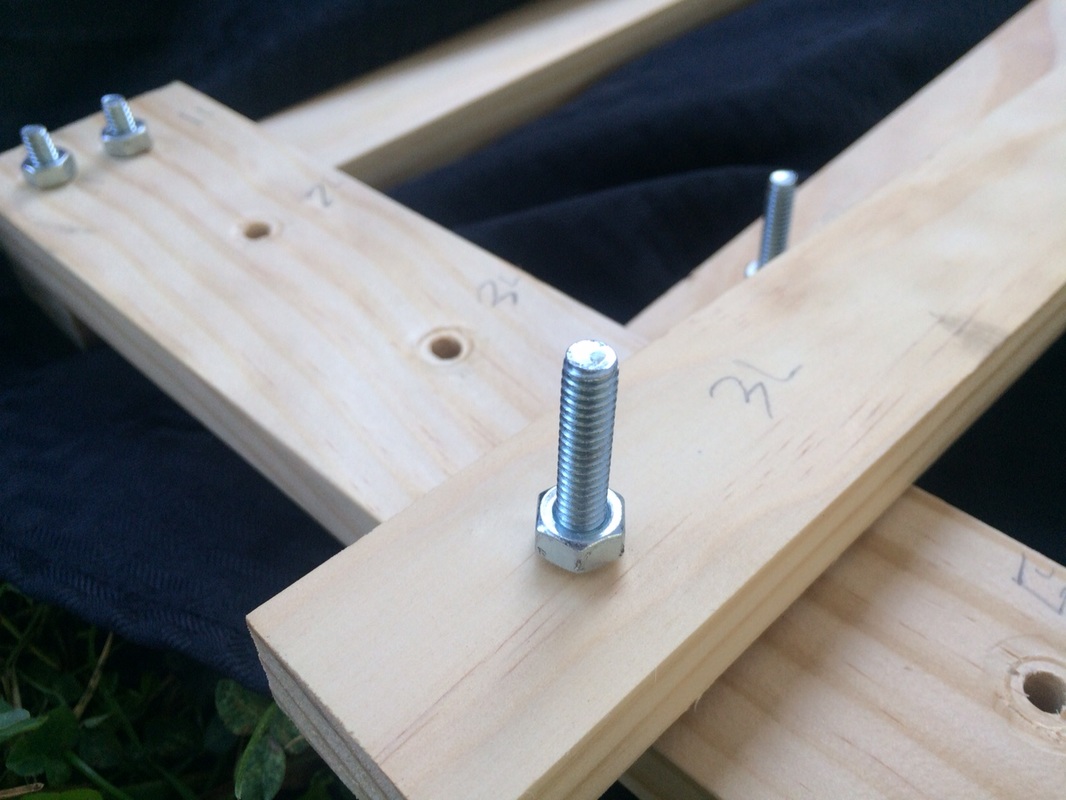
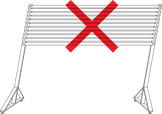
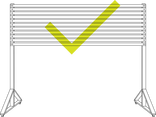
SLATTED WALL For the slats, the wood was used as purchased with no modifications other than drilling holes into where the slats would connect to the legs of the wall. These holes will house the bolts when finally constructed. When drilling, keep in mind the size of the bolts to use so there is not any "wiggle room" in the holes. The tighter the bolts are to the wood, the better, as less racking will occur (see below). Additional slats may be added based on preference. To start, we've used 9 slats, but will eventually add more. To add more slats, simply drilling more holes would be all that is needed (plus bolts and nuts). The distance we've used to measure between each slat is the depth of the wood used, but this is entirely conditional and based on preference. Feel free to space out your slats however you'd like; this piece is easily customized. LEGS AND FEET We used triangle feet to keep the frame of the legs stable and balanced. Four pieces were measured and cut at 45-degree angles at the ends to sit flush with the vertical wood of the frame as well as the bottom piece which the wheels will attach to, when finished. Wheels are optional, though we chose to use two locking and two static casters to allow for versatility. Because our display sat on a grassy area, wheels weren't necessary, but may be ideal when used on concrete, wood, and other flat, smooth surfaces for future shows.
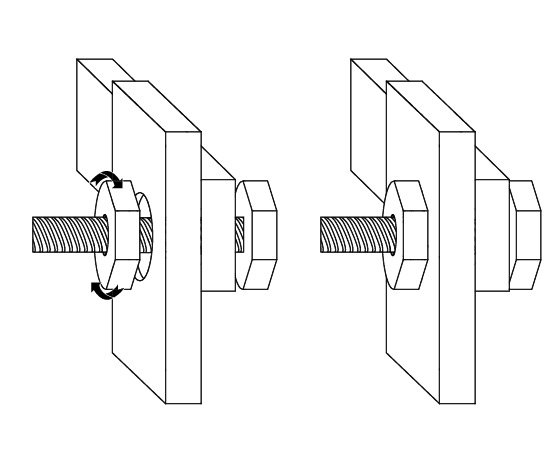
BEWARE OF RACKING Racking will occur when the bolts and nuts are not tightly connected. When the nuts are loosely installed, the wall will sway to one side or the other. To avoid this, ensure each nut is tightly screwed onto each bolt. Use two pairs of lockable pliers to hold the front of the bolt in place while tightening the nut in the back of the wall. To add more stability, we've placed four bolts in the top slat as well as the bottom, which reduces racking. Racking may also be reduced by adding more slats to the wall.
TAKE DOWN AND TRANSPORT The slats will come off the legs of the wall simply by loosening to nuts on the back. We recommend carefully laying down the wall on its face (onto a blanket) for easy take down without harming the wood or yourself before beginning. The legs and feet will not disassemble, so when the wall is taken apart, you will have three components: each leg and all the slats of wood (variable). Once the slats have been removed from the legs, the bolts and nuts can remain in the holes of the slats, secured, to allow for easy storage and lower risk of loss. The slats can then be bundled together and tied with rope or other material to wrap for easy carry. HOW TO HANG Of course, how you plan to use the wall is entirely individual, so the materials needed will also vary. We chose to use metal hangers (Cubicle wall hanger, $2.50 each at Walmart) and wire from the Dollar Store to showcase our photography, which fared really well. 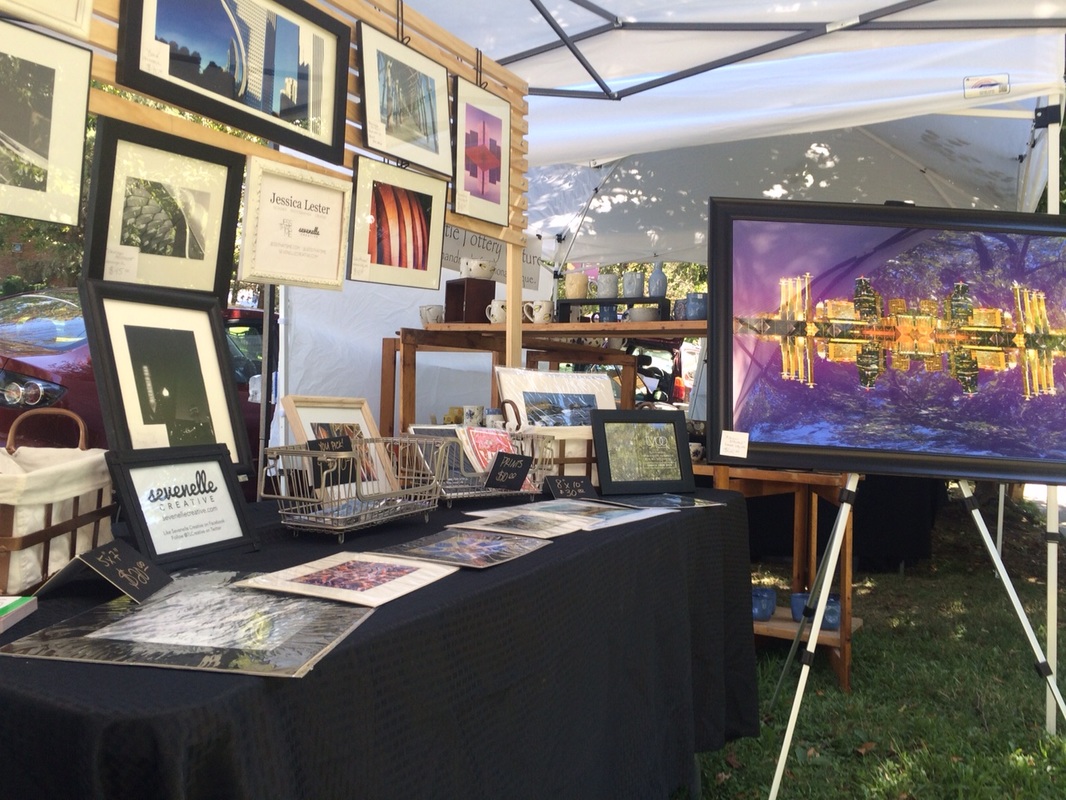 We want to hear from you! Share your ideas and thoughts below and if you've built a wall, we want to see it! Send us a shoutout at [email protected].
Happy building!
1 Comment
I have been toying with the idea of building something along these lines for craft shows, but I couldn't find what I wanted. I happened to stumble across this today, and I love how this can be customized (space-wise when hanging things)! Thanks for sharing...this may be in the works for me soon. :) Leave a Reply. |
SEVENELLE
|


 RSS Feed
